Wednesday, September 19, 2012
Guess What?!
So after I published that last post I looked at the schedule for the gym again and saw that they had another class at noon and I don't have to be at work till 4. And I got back in my car and I went! and it was hard! But I feel so good. I can barely lift my arms to type but I can't stop smiling either. I am so proud of myself! Now to make sure this wasn't a one time thing...Oh and when I get home, Nick eats a piece of pie right next to me. Men!
Workout Fail
Ok guys, confession time. I can't remember my last workout. It's been that long. I did little mini workouts last month on vacation and that was probably the last time. I just haven't been feeling well. Time-wise mornings are the best for me, but they are the worst for feeling like moving. I have this groupon I bought a WHILE back for a one month gym membership and I keep thinking "oh, I need to go use that," (it expires in like 6 days now) anyway I asked my husband to call me this morning to encourage me to actually get my butt out of bed and go. I didn't make it to the first class, but I got up and got dressed, got my water and got in the car and went! but, seeing as this was my first time going to a new place, and I am not accustomed to morning traffic, I did not leave myself enough time to get there the 15 minutes early that I had planned and then when I couldn't find the place, I was just late. Oh, I have a fancy phone, why didn't I use the GPS? I tried. apparently my "location is temporarily unavailable" fat lot of good that does me! Well I finally found the place and there was no one at the front desk to talk to, and class had already started so I went home. Very sad. but now I know where it is and how long it will take me to get there and I have tomorrow off of work entirely so I have no excuses. Let's hope I don't come up with any by tomorrow...
Tuesday, September 18, 2012
I'm still alive!
Hello there internet users!
I decided that I was putting too much pressure on myself in my head with this whole blog thing and that's why I kinda stopped completely. But I just decided that there don't have to be any rules, because this is my blog. So. I will not require there to a project or anything of any real substance going forward, this blog is just about my thoughts, my day, maybe some DIYs and recipes, trying to drop a food pounds, whatever I feel like! thanks guys!Well I have to get off to work but I will be back soon!
I decided that I was putting too much pressure on myself in my head with this whole blog thing and that's why I kinda stopped completely. But I just decided that there don't have to be any rules, because this is my blog. So. I will not require there to a project or anything of any real substance going forward, this blog is just about my thoughts, my day, maybe some DIYs and recipes, trying to drop a food pounds, whatever I feel like! thanks guys!Well I have to get off to work but I will be back soon!
Monday, February 20, 2012
Dresser Reveal
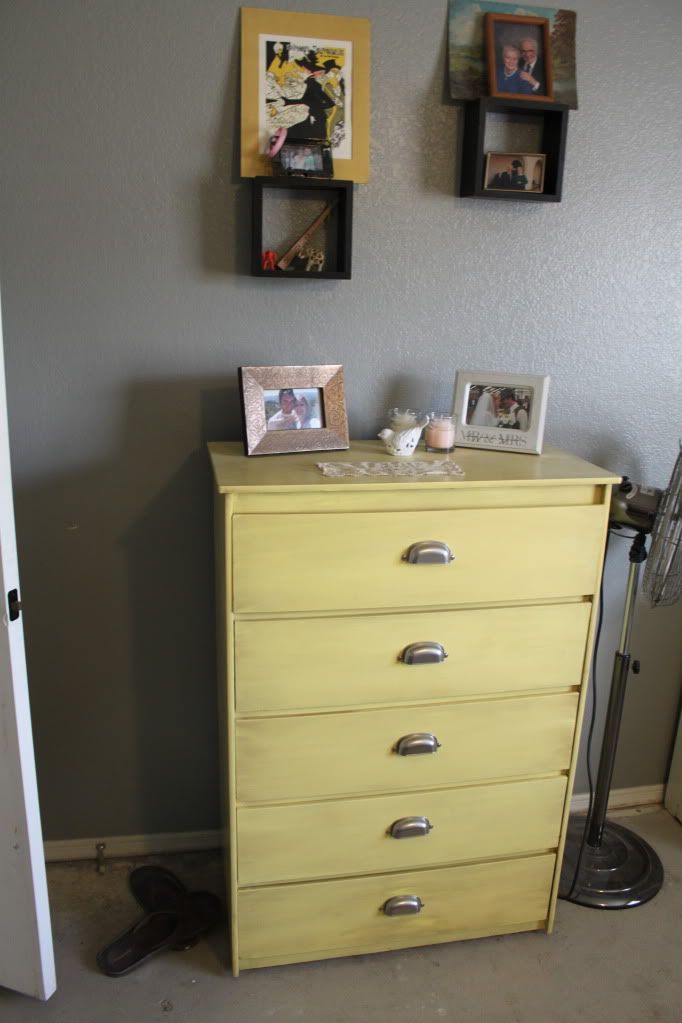
After so long without a post, I thought you guys deserved 2 posts in one day! Here is the dresser that I finished weeks ago now. I absolutely love the way it turned out!
So it started out as a white dresser that my mother-in-law gave us when they moved. As I was sanding it, I discovered that it was originally that fake wood grain stuff and had been painted white. Which was lucky for me because it meant I didn't have to prime it! I used a yellow test-pot that I got when I was trying to decide what color to paint my kitchen. After using it on my dresser, I almost wish I had chosen this color instead!
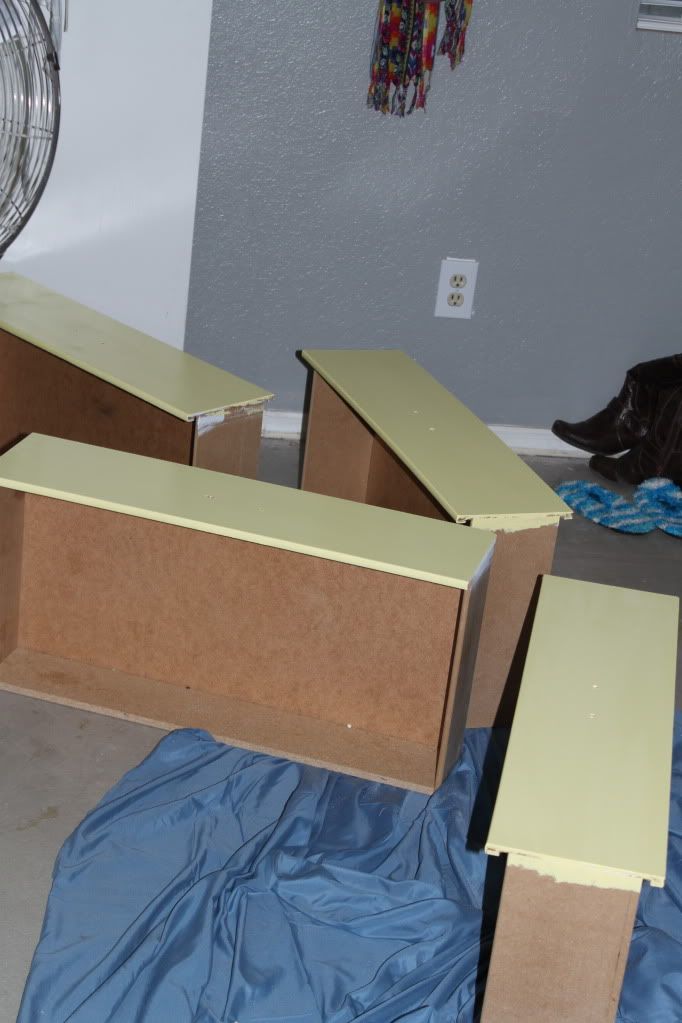
After sanding it down, I wiped it clean and then went straight to the yellow paint. It went on great and I had enough in my little test pot to even get two coats on. Once the yellow paint dried, I pulled out some Minwax stain in Dark Walnut and wiped it on and then wiped it off.
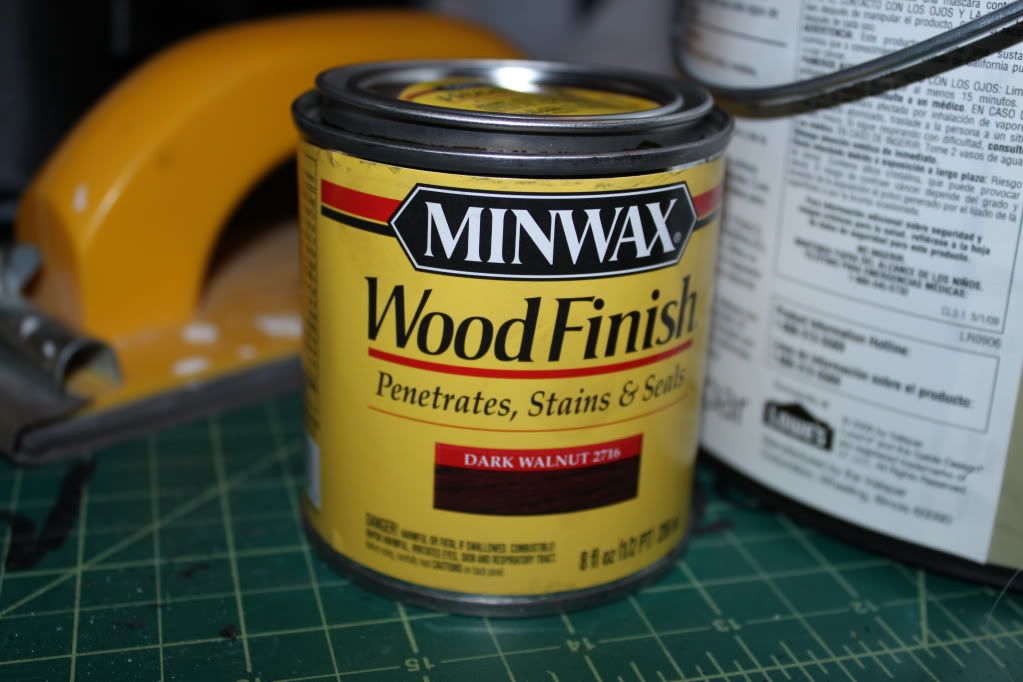 It toned down the yellow and gave it a ton of character. I've never tried this before but will definitely be using this technique again. After letting that dry for a while, like a day, I put on a poly top coat or two and used the martha stewart cup pulls that I originally got for "the thing" and the best part was that I didn't even need to drill new holes because the were the same size as the ones that were on it previously!
And here she is!

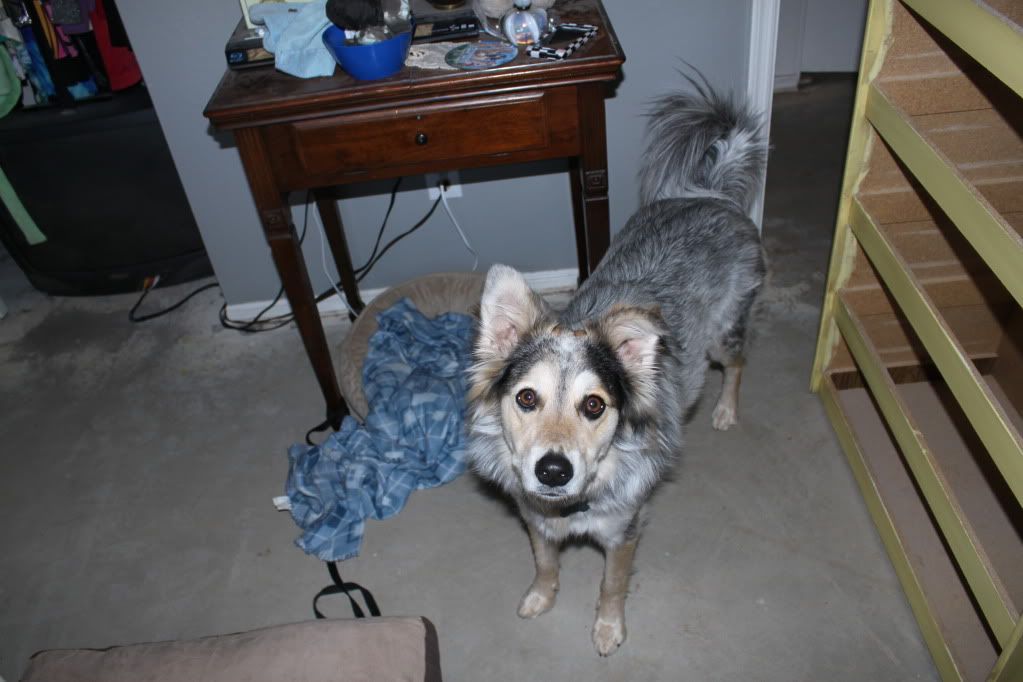
And I don't recommend painting, staining, anything around a dog with this much hair!
So it started out as a white dresser that my mother-in-law gave us when they moved. As I was sanding it, I discovered that it was originally that fake wood grain stuff and had been painted white. Which was lucky for me because it meant I didn't have to prime it! I used a yellow test-pot that I got when I was trying to decide what color to paint my kitchen. After using it on my dresser, I almost wish I had chosen this color instead!
After sanding it down, I wiped it clean and then went straight to the yellow paint. It went on great and I had enough in my little test pot to even get two coats on. Once the yellow paint dried, I pulled out some Minwax stain in Dark Walnut and wiped it on and then wiped it off.
And here she is!
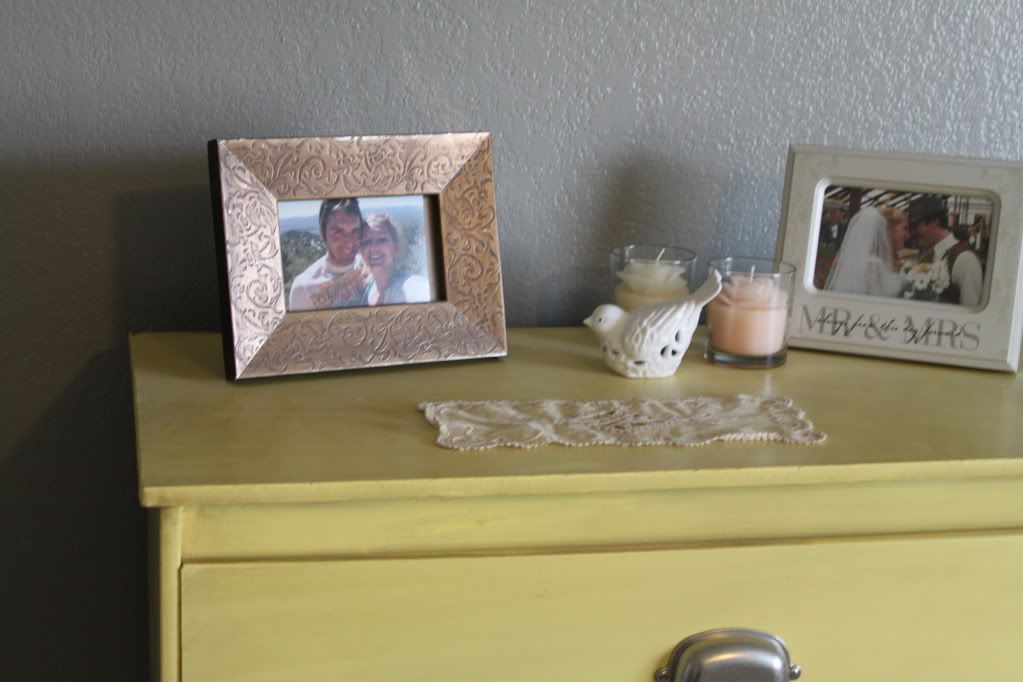
I even had so much extra space after cleaning out my clothes that I turned the top drawer into a space to hide my watches, jewelry box, etc. That cleared a lot of clutter off of our little table
And I don't recommend painting, staining, anything around a dog with this much hair!
Thanks for reading!
Beth
Finally!
I am finally feeling somewhat human again and getting back to normal every day activities besides work and sleep. So I know Valentine's was almost a week ago but I wanted to share what we did to celebrate our first V-Day as a married couple. Let me just say it was the best! I usually work Tuesday nights but since Nick has Wednesdays off, I decided to take the night off. So thanks Crystal for subbing for me! (I teach swim lessons at SWIMkids USA) Our Valentine's celebration officially started when I got home from work Monday night and hubby surprised me with flowers when I walked in the door! I somehow neglected to get a picture of them.

In the morning we started the day with Starbucks thanks to a couple giftcards I got at Christmas and I made breakfast, Nick's favorite is french toast but I decided to cut the bread into heart shapes to add some extra love. And since I didn't have any cookie cutters I just used my kitchen scissors to make the shapes. He loved it.

Then I made some sugar cookie dough, I used this recipe from All Things Thrifty and put it in the fridge to chill while we went to see "The Vow" which we enjoyed. While we were out we had lunch at In-N-Out Burger (so good!). Then before going home, we picked up some cookie cutters at Wal-mart for our sugar cookies waiting back home.
When we got home I pre-heated my oven, rolled out my dough and made a bunch of hearts and bows. After they were all out of the oven and cool, I called in the hubby and we frosted them together. Of course quite a few got eaten in the process. Nick: frost ones cookie, then: "can I eat this?" They were delicious, we still have a few left, it was a big recipe and there are only two of us.

It was still early and we weren't all that hungry for dinner yet from our late lunch and sugar cookies, so we killed some time before going out to dinner with some video games. Then we went to dinner at Joe's Crab Shack and I got a huge bucket full of all kinds of delicious seafood, crab legs, lobster tail and mussels. So fun, and so delicious! I also ordered a fun drink in a mason jar that I got to take home as a souvenir of our first valentine's.
Back home, we watched the notebook and cried oh and we exchanged gifts. Overall it was a wonderful day with the man of my dreams!

In the morning we started the day with Starbucks thanks to a couple giftcards I got at Christmas and I made breakfast, Nick's favorite is french toast but I decided to cut the bread into heart shapes to add some extra love. And since I didn't have any cookie cutters I just used my kitchen scissors to make the shapes. He loved it.
Then I made some sugar cookie dough, I used this recipe from All Things Thrifty and put it in the fridge to chill while we went to see "The Vow" which we enjoyed. While we were out we had lunch at In-N-Out Burger (so good!). Then before going home, we picked up some cookie cutters at Wal-mart for our sugar cookies waiting back home.
When we got home I pre-heated my oven, rolled out my dough and made a bunch of hearts and bows. After they were all out of the oven and cool, I called in the hubby and we frosted them together. Of course quite a few got eaten in the process. Nick: frost ones cookie, then: "can I eat this?" They were delicious, we still have a few left, it was a big recipe and there are only two of us.
It was still early and we weren't all that hungry for dinner yet from our late lunch and sugar cookies, so we killed some time before going out to dinner with some video games. Then we went to dinner at Joe's Crab Shack and I got a huge bucket full of all kinds of delicious seafood, crab legs, lobster tail and mussels. So fun, and so delicious! I also ordered a fun drink in a mason jar that I got to take home as a souvenir of our first valentine's.
Back home, we watched the notebook and cried oh and we exchanged gifts. Overall it was a wonderful day with the man of my dreams!
Wednesday, February 8, 2012
Sorry Guys
I know I just started this thing and I'm already slacking on posting, but I haven't been feeling very well. The dresser is done, I just need to get some pics of it so I can show you all.
talk to you soon
Elizabeth
talk to you soon
Elizabeth
Monday, January 30, 2012
Dresser Re-do
I'm in the middle of updating my white dresser, here are some teasers, more to come when it's all done!


|
| Puppy wanted to help but I told her that licking the drawers was not helpful |
Our Trip to Payson
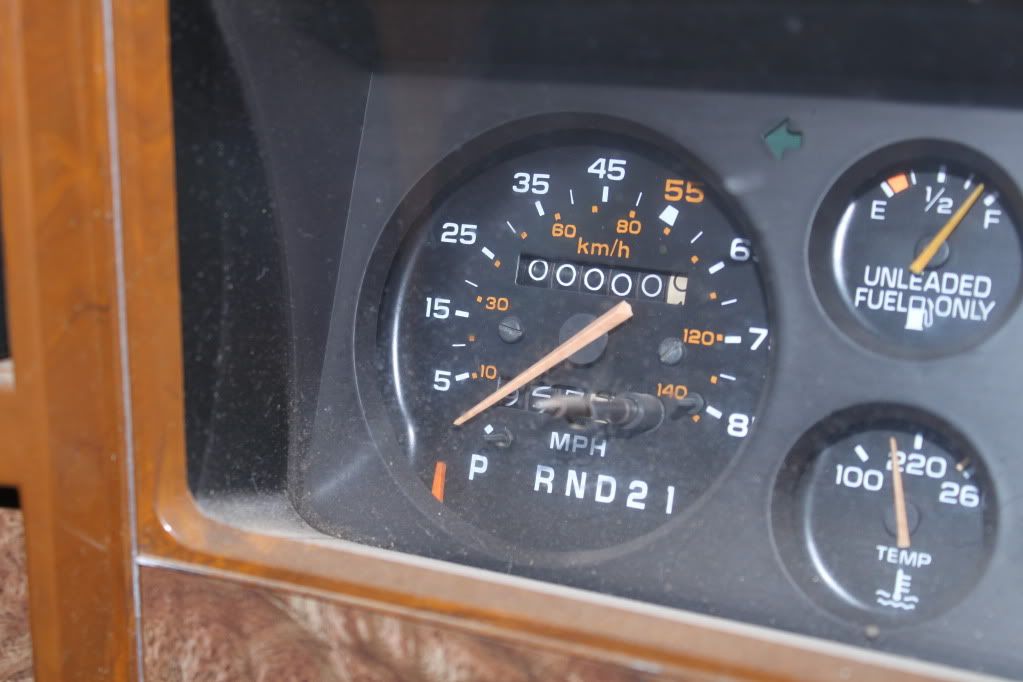
This weekend was a blur. I can't believe it's Monday morning already. I've been spending my days re-organizing my house as so many of you have been lately but Saturday afternoon when I got home from work instead of organizing, my husband said: "wanna go on a roadtrip?" We had said we were going to do something special to commemorate our El Camino making it to 200,000 miles and so we decided to take a day trip to Payson. And it was the perfect afternoon! The drive flew by thanks to an issue of Martha Stewart Living and some good conversation. I didn't even think about the fact that we didn't have any radio until almost half way home. Here are a few pictures.


 |
| here's where we started |


 |
| getting closer |
 |
| swanky blazer for only $1 |


 |
 |
| we made it! |
Friday, January 27, 2012
A few quick kitchen DIYs
Hello, before I quit for the day, I wanted to share a few of my favorite projects from my yellow kitchen that I told you all about earlier. First we have the cup hooks. Seems simple enough right, screw some hook in, but I wanted the hooks to hang down and show off their pretty little handles, so I went to the garage and found a piece of wood I had save from our old ugly coffee table that has long since been donated to goodwill. I think Mr. Ashe thought I was crazy when I saved this. The story was, we had this old coffee table but I liked to sit at it working on various projects for our upcoming wedding at the time but there was a piece of wood that went along the floor so it was in my way and I couldn't put my legs under it. One day Mr. said I could take it off and I got so excited! I easily removed it and then promptly put it in the garage. He asked me what I was going to do with it and I said I don't know yet. Because you never do. But this was real wood, why would I just throw it away when I knew it could come in handy one day. And it did. It was the perfect depth to go under the cabinet and not show but still maximize viewing of the adorable teacups that my mother in law gave us. So I measured the cabinet and cut the wood slightly smaller. I measured so the cups would be evenly spaced, screwed in the hooks, then screwed the wood into the cabinets and hung up my teacups! I love it! Here is the view I see everyday

and here is what it looks like under the cupboard


This little sign used to say something like "Gone to Therapy" I got it for about $3 at Ross. I had a lot of trouble trying to decide what to put on it and finally landed on the classic "Home Sweet Home." All I did was paint over the old words with some brown acrylic paint I had on hand, you can see there is somewhat of a border around the edges, that was already there and I just didn't put as thick of a coat over that so it would show through a little. For the words, I went a little old school. I don't have a fancy Silhouette machine to cut out vinyl letters for me so instead I found a font that I liked and printed my phrase out in the size I wanted on regular paper. I cut the letters out with a X-acto knife and then used them like a stencil and carefully used a skinny little brush and some white paint to paint it on. The first "Home" looks a lot neater than the rest of it, I think I was getting impatient. but I still like the way it turned out and now it hangs above my sink

The last little DIY that I want to share today from my kitchen is the hooks where we hang the dog leashes. This started out as a shelf in our DVD rack but we didn't need it and so I repurposed it into this little beauty. I love the way it turned out. All I did was sand a little, then paint on some Buttermilk colored milk paint, I didn't do it very thick and so the black shows through just a little, which I like. after that dried it was time to add the paw prints. I used some black ink and even with a cooperative dog it wasn't super easy but I stamped two paw prints, one from each dog. The ink didn't show up very well, but it was enough that I could then trace around it with pencil to make the shape I wanted. I filled it in with black paint and then added my hooks. I used a stamp pad to add some faux distressing around the edges and put s couple of picture hangers on the back and hung it on the wall.

My Yellow Kitchen
As promised, I cleaned my kitchen and now I can show you what I have going on in there. I finally have it where I love my kitchen! When we moved in it was a not so pretty blue color and I didn't realize how much I hated it until I painted it the color I wanted and am so much happier now! When I was younger I had a yellow bedroom for a little while and it was so pretty and happy and I always loved it. Unfortunately we have to move so I didn't get to enjoy it for very long. Now that I have my own house, I wouldn't subject the Mr. to such a girly choice in the bedroom (ours is grey) but the kitchen is all mine! So the yellow is back and so bright and cheery and I love it! probably a year ago I saw this wallpaper in a kitchen on tv and fell in love with it. At the time I didn't know what it was called or where to find it, so I just kind of filed it away. Then one day I found a wash cloth at my mom's house with the pattern on it, I googled the company and finally had a name for it. The pattern I am speaking of is the Moroccan pattern that is popping up everywhere now. And THEN I saw Jamielyn's Blue Stenciled Wall and had a heart attack! I had been looking for wallpaper, hadn't even thought there might be a stencil I could use which would be even better than wallpaper! But, being the cheap, er frugal, woman that I am, wanted a way to do it for less. That's when I found this post from Jones Design Company and knew I could do my kitchen for free! I printed out template and cut it out on mat board and started tracing! It took forever. My mom helped one day, I didn't do it all at once and it took probably a week in all including painting the yellow first. I used a 1/2" artist paintbrush and some leftover white paint we had in the garage. I love how it turned out and I can see it from the couch so it makes me happy! I only did one wall but I'm still trying to decided if I should do a second one. Here are a few pictures.


and the rest of my kitchen:


So you might be wondering where all of my appliances like the toaster and can opener are, yes I do own all of these things, but I don't use them on a regular basis so one day during my "make my kitchen pretty" week I cleaned out all my cupboards and reorganized them to make room for the gadgets. So now my toaster is hiding in that corner cabinet, my mixer is with the baking ingredients in my pantry, the can opener, next to the few canned goods we have. I even moved my knife block into the lazy susan, since I do use that frequently but think it is pretty ugly. Now it is still easily accessible but hidden from view. The best part of hiding the ugly stuff is that now I can have cute things on my counter like pictures of my furbabies. Sorry the rug has some dog hair on it but I just got it at Target and wanted to show it off, only 9.99 and it is perfect! I'll show a couple DIY's in a separate post coming up soon
My First Blog!
Hello internet! After years of reading blogs and getting so much inspiration I finally decided to add some of my own projects to the blogosphere. My name is Elizabeth and I have been a DIY, crafter, thrifter whatever girl for as long as I can remember. I see things at the store or in catalogs and I always tell my husband why pay so much for that when I Could Just Make It? So that's what I do. I make things in the most frugal way possible. My husband loves how cheap I am. My projects are all over the place, often taking on totally new things that I have never tried before. I accomplish these things with the moral support of my husband who always reminds me that I am "good at things" when I hit a roadblock and am feeling down, and also with the help and usually tools of my amazing dad. My dad has done a little bit of everything so he is the first place I go when I want advice on how to make a picture in my head become reality. He's my Google. Anyway enough about me, here is my first project. And since I am new to the whole blogging thing please forgive me if it takes me some time to figure out how to do stuff! Unfortunately I decided to feature this piece of furniture after it was already finished so there are no awesome before pictures, which sucks because I love a good before and after! Anyway here she is and in case anyone is wondering I will give you a little insight on how she came to look this way.
 |
| You can still see the drill on top hehe |

So the hubster and I have been calling it "The Thing" because we're not really sure what purpose it was originally intended for. the very top knob pull out a shelf like thing, kind of like a keyboard tray on a computer desk except you cant store anything on it. my dad says it is for entertaining and it gives you extra space to put out food or whatever. Anyway. There is a sticker on the back from Pier 1 but I found her at a local thirift store for 12.99. She started out with ridges on the front and when I bought her I wasn't in love with them but wasn't sure what to do with it but still wanted the furniture. It's nice to have something that is taller and sturdier than most of the end table I have seen around (this is next to our couch btw) since we have a large rambunctious puppy who has ruined more than a few things by knocking drinks over on our current coffee table/ottoman. So. That is her practical purpose and I had to move a chair to make room for her but that's how I convinced the husband we needed her. Now onto how I made her more stylish. First I thought I would have to buy new wood to make new drawer fronts and that was not an ideal solution since it would cost more than I paid for the thing. I told my dad this plan and being the experienced man that he is took one look at it and said I could unscrew the current drawer fronts and turn them around! He says these things and afterwards I feel like DUH! why didn't I think of that? But I never do. Maybe I don't try hard enough to find my own solutions since I know I can just ask him how to do it. That's something I need to work on. The main reason I run to him right away is that yeah I can probably figure out how to do stuff but he usually knows the right or at least a better way. His way is usually easy or just looks better. Ok sorry if I am a rambler! I will try to learn as I continue with this blogging business. So I unscrewed the drawer fronts and turned them over. I filled in the old screw holes with wood putty, sanded and painted them a glossy black that I had in the garage and matches pretty closely to the rest of the piece. At first I was thinking I would paint them a fun color like Aqua or Salmon or something but I got these cute cup pulls from Martha Stewarts line at Home Depot (my favorite store after Target) and they looked so good against the solid black. I sanded them a little after the paint dried so they wouldn't look like they just got a fresh coat of paint. but I couldn't just leave them black. that seemed so boring. I just went on a long rant about my kitchen but I deleted it for your sake and will save it for another post about my kitchen. That will have to wait till I clean it. Long story short, my inspiration for this piece came from the pattern I painted on my kitchen wall. phew. Just avoided a very long tangent. Here you can see a couple of pictures of my kitchen. I used a template from Jones Design and cut it out of mat board.

In the kitchen I did a double line but on the thing I decided to do it single. I taped all of the drawer fronts together using painters tape on the back and then drew my pattern on. I painted the design using a 1/2" artist paint brush and some leftover grey paint from our master bedroom. I knew saving that tiny bit of paint would come in handy someday! I let that dry and then held up my cup pulls...Didn't love it anymore. when it was plain black the cup pulls gave it cool industrial look but now they didn't work. I needed something more exotic. So I went on the hunt. I went to Anthro and Home Depot and finally found some that I thought would work better at Cost Plus World Market. (I love that place) But I got home and still couldn't decide. I even considered using the original pulls that were on it that I had hated at first! My husband thinks I am crazy. Then I decided to put it back together and then decide. So I put one option on the bottom drawer and another option on the middle drawer and when I put them into the thing they looked great! both styles together. So that is the story of how the thing came to have mismatched pulls and I love them. Now, getting them to fit was a whole nother story. I drilled new holes for them and put them in and they weren't long enough to fit through the front and the drawer. So after pouting for a minute and almost giving up and saying I'll just wait till my dad can help me, I got an idea from the way I put the screws in. My dad has recently taught me of how easy it is to counter sink screws and while the screws I used for this project do it by themselves, I thought I could counter sink the nuts for the drawer pulls since they were so close to fitting. So I took the biggest drill bit that My husband has (which is soooo dull btw and not all that big, it's 1/2") and I drill into the hole that the bolt part of the pull would be going through until I could get it in far enough to screw the nut on. I chucked the washers that came with them and here is a picture, it is hard to see but just in case you were wondering. I could paint it all black but it's the inside of a drawer so who cares?

oh and as I was putting it all together I realized that I am not the smartest person in the world and I had to re-paint the top piece because it was upside down when I painted it the first time. ugh. I hate when I do stuff like that. And it's a lot. Well there you have it! Congratulations are in order if you made it through this long-winded post!
Subscribe to:
Posts (Atom)